

I use curves a lot in my designs. I have looked high and low for a large sanding drum and never found one. I need one now, so I have to make it myself.
I’m making a trim piece that fits around a cylindrical wall safe, so I have a rectangle of wood with an 8” diameter hole in the middle. That inside curve needs to be nicely sanded. I don’t have a spindle sander, I just use the small sanding drums you can buy with the replaceable sleeves and the arbor/core that chucks into a drill press. The problem is that the diameter on those is too small to finish larger sweeping inside curves, leaving small scallop ridges that are difficult to hand sand away. Even for smaller curves that have to be really nice, like the 8” diameter I am making today, the largest, 3”, drum is too small. I want a bigger one. It has to be somewhat smaller than 8”, so I’ll target approximately 7” to 7 1/2”.
Starting With Plywood
I had some 3/4” Baltic Birch scraps, and I thought a thickness of about 3” would be good, so that would take 4 layers.


I cut 4 squares at about 7 1/2” and cut off the corners using my miter saw, then I glued them together, using a 1/4” dowel for alignment. After the glue dried I did a little more trimming on the band saw to make it a rough cylinder, then it was time to add the arbor.


I used a 1/2” hex head bolt similar to this one. Its Important that it have a smooth, unthreaded neck at the end, because that chucks into the drill. I hacksawed off the head and a bunch of the threaded part on the other end since the bolt I had was too long. The 1/2” hole I drilled in the middle was really snug, I had to hammer the bolt in, but thats a good thing! Next, it was off to my edge sander to start rounding the drum.
Rounding The Rough Block


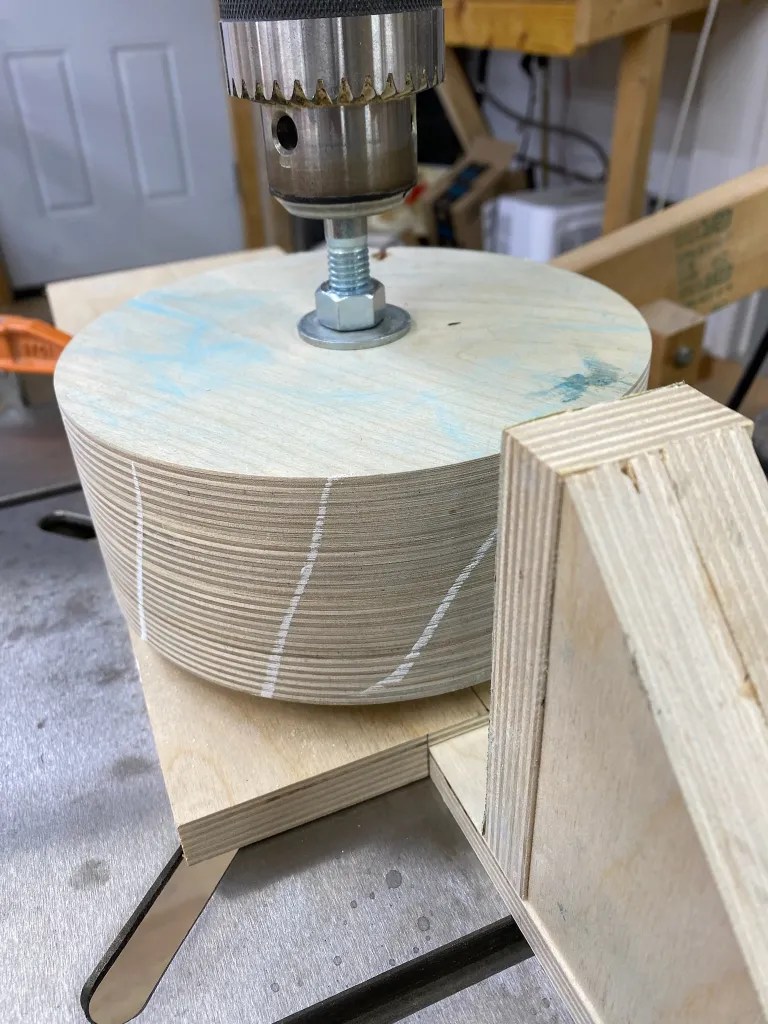
I have board on top of my sander table with a runner underneath that fits in the long slot in the edge sander table. Into that I drilled a hole centered at the radius of my drum, 7.5”/2, or 3.75”. Then I drilled drilled a hole 1/8” larger than the washers on the bottom. That gave me some play, since the drum isn’t very round yet. As the roundness evened out, I could press into the sander more until the washers stopped at the edge of the hole. This process got the drum rounder, but not round enough. I needed another jig for that.
The Final Rounding


I needed a contraption. One that I could use to evenly press sandpaper against the spinning drum at 90 degrees, so I made one.
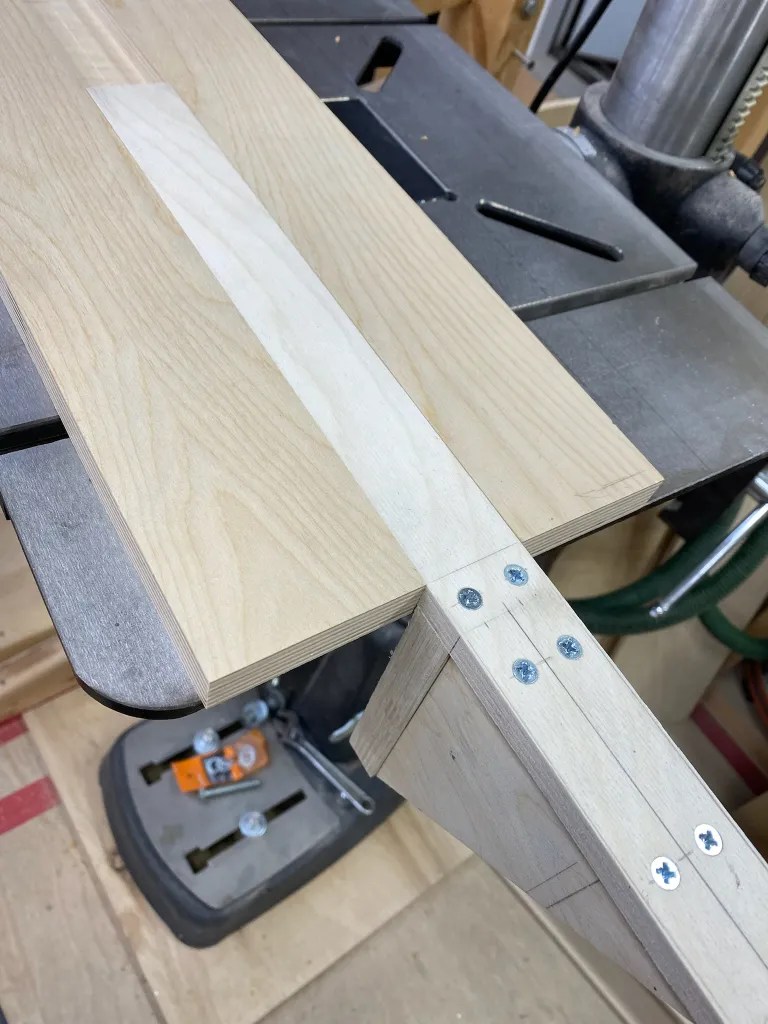

You can see the bottom slot, and see how the runner fits in the slot. My sliding sandpaper block would stop at the edge of the slotted board to provide a final diameter. You can see the green 80 grit sandpaper on the face of the block. I used 3M ”77” spray adhesive to mount it. That worked ok, but the heat of sanding melted the adhesive and the paper would eventually come off. I have ideas how to improve this, but for now I just suffered, replacing the paper over and over. I smoothed it a little with 120, and that was good enough.
Attaching Sandpaper To The Drum
At first I thought this would be a real challenge, but I got a big idea, I would wedge it in.

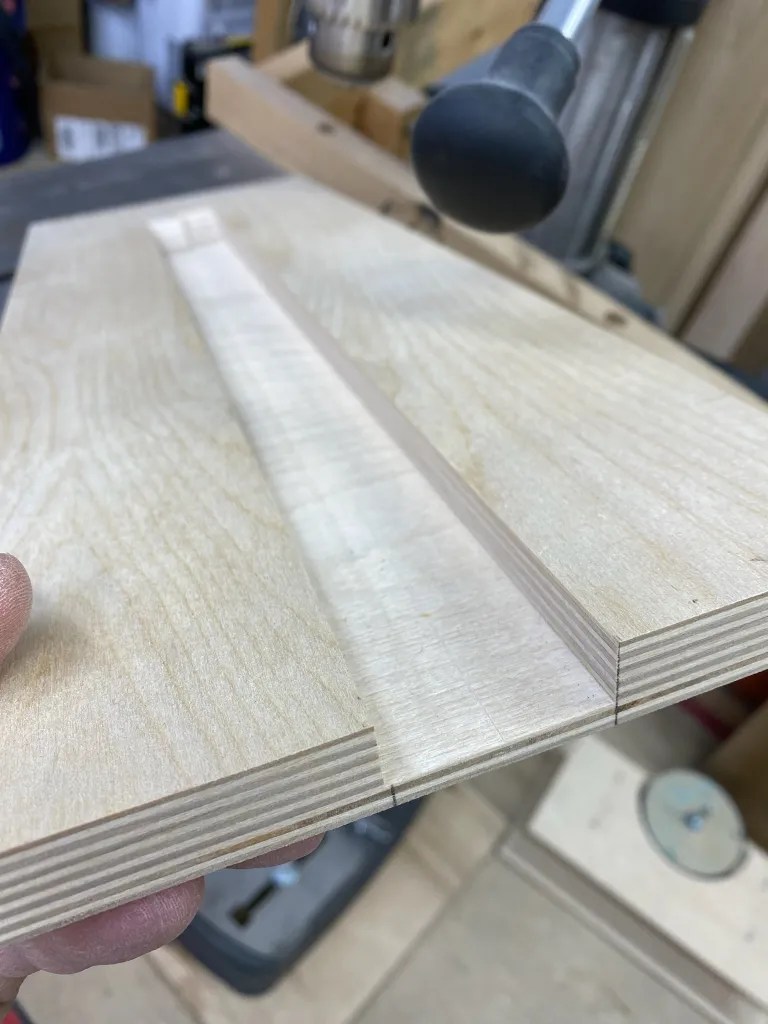
First I drilled a 1/4” hole, centered about 5/8” from the drum edge. Then, using a bandsaw, I cut a vertical kerf about 3/32” wide. That kerf went through the hole and past, about 1/8”. A little further would have been better, but its ok.


For sandpaper I used 3” drum sander paper. It has a cloth backing, so its pretty thick and durable, and wont tear. To wedge it in I used 1/4” dowels that I tapered by hand. you can see me using one to hold the sandpaper tight as I inserted the top dowel. I added another dowel at the bottom. These dowels are poplar, because that’s what I had, but they are too soft, so I’ll replace them with oak.
The Last Contraption
We now have a great sanding drum, but we aren’t finished! We still need a way to use it, We need a sanding platform.


I had been down this road before, making a platform for the small store-bought drums, I just needed to make one with a bigger hole. So here it is. The standoffs allow me to raise and lower the drill press table to use less-worn parts of the drum. In the last photo you can see how much better the large diameter matches with the diameter of my safe trim – that means a way smoother edge with less chatter.
It’s A Done Deal
That’s it. It was a ton of work, but well worth it. In the fve months since I built it, I have used it on four projects. There are a few design tweaks that I’ll incorporate later, including a way to hook up a dust collection hose. If you have any ideas about any if this, share them with a comment.
Leave a Reply